Azure-Advanced-Networking
M02-Unit 7 Create a Virtual WAN by using Azure Portal
In this exercise, you will create a Virtual WAN for Contoso.
In this exercise, you will:
- Task 1: Create CoreServicesVnet and ManufacturingVnet
- Task 2: Create a Virtual WAN
- Task 33: Create a hub by using Azure Portal
- Task 4: Connect a VNet to the Virtual Hub
-
Task 5: Clean up resources
Note: An interactive lab simulation is available that allows you to click through this lab at your own pace. You may find slight differences between the interactive simulation and the hosted lab, but the core concepts and ideas being demonstrated are the same.
Estimated time: 70 minutes (including ~45 minutes deployment waiting time)
Task 1: Create CoreServicesVnet and ManufacturingVnet (If required)
Note: If you did the previous lab the Networks will already exist. You can go to Task 2
- In the Azure portal, select the Cloud Shell icon (top right). If necessary, configure the shell.
- Select PowerShell.
- Select No Storage Account required and your Subscription, then select Apply.
- Wait for the terminal to create and a prompt to be displayed.
-
On the toolbar of the Cloud Shell pane, select the Manage files icon, in the drop-down menu, select Upload and upload the following files azuredeploy.json and azuredeploy.parameters.json into the Cloud Shell home directory from the source folder C:\Allfiles\Exercises\M02
-
Deploy the following ARM templates to create the virtual network and subnets needed for this exercise:
$RGName = "ContosoResourceGroup"
#create resource group if it doesnt exist
New-AzResourceGroup -Name $RGName -Location "eastus"
New-AzResourceGroupDeployment -ResourceGroupName $RGName -TemplateFile azuredeploy.json -TemplateParameterFile azuredeploy.parameters.json
Task 2: Create a Virtual WAN
-
From a browser, navigate to the Azure portal and sign in with your Azure account.
-
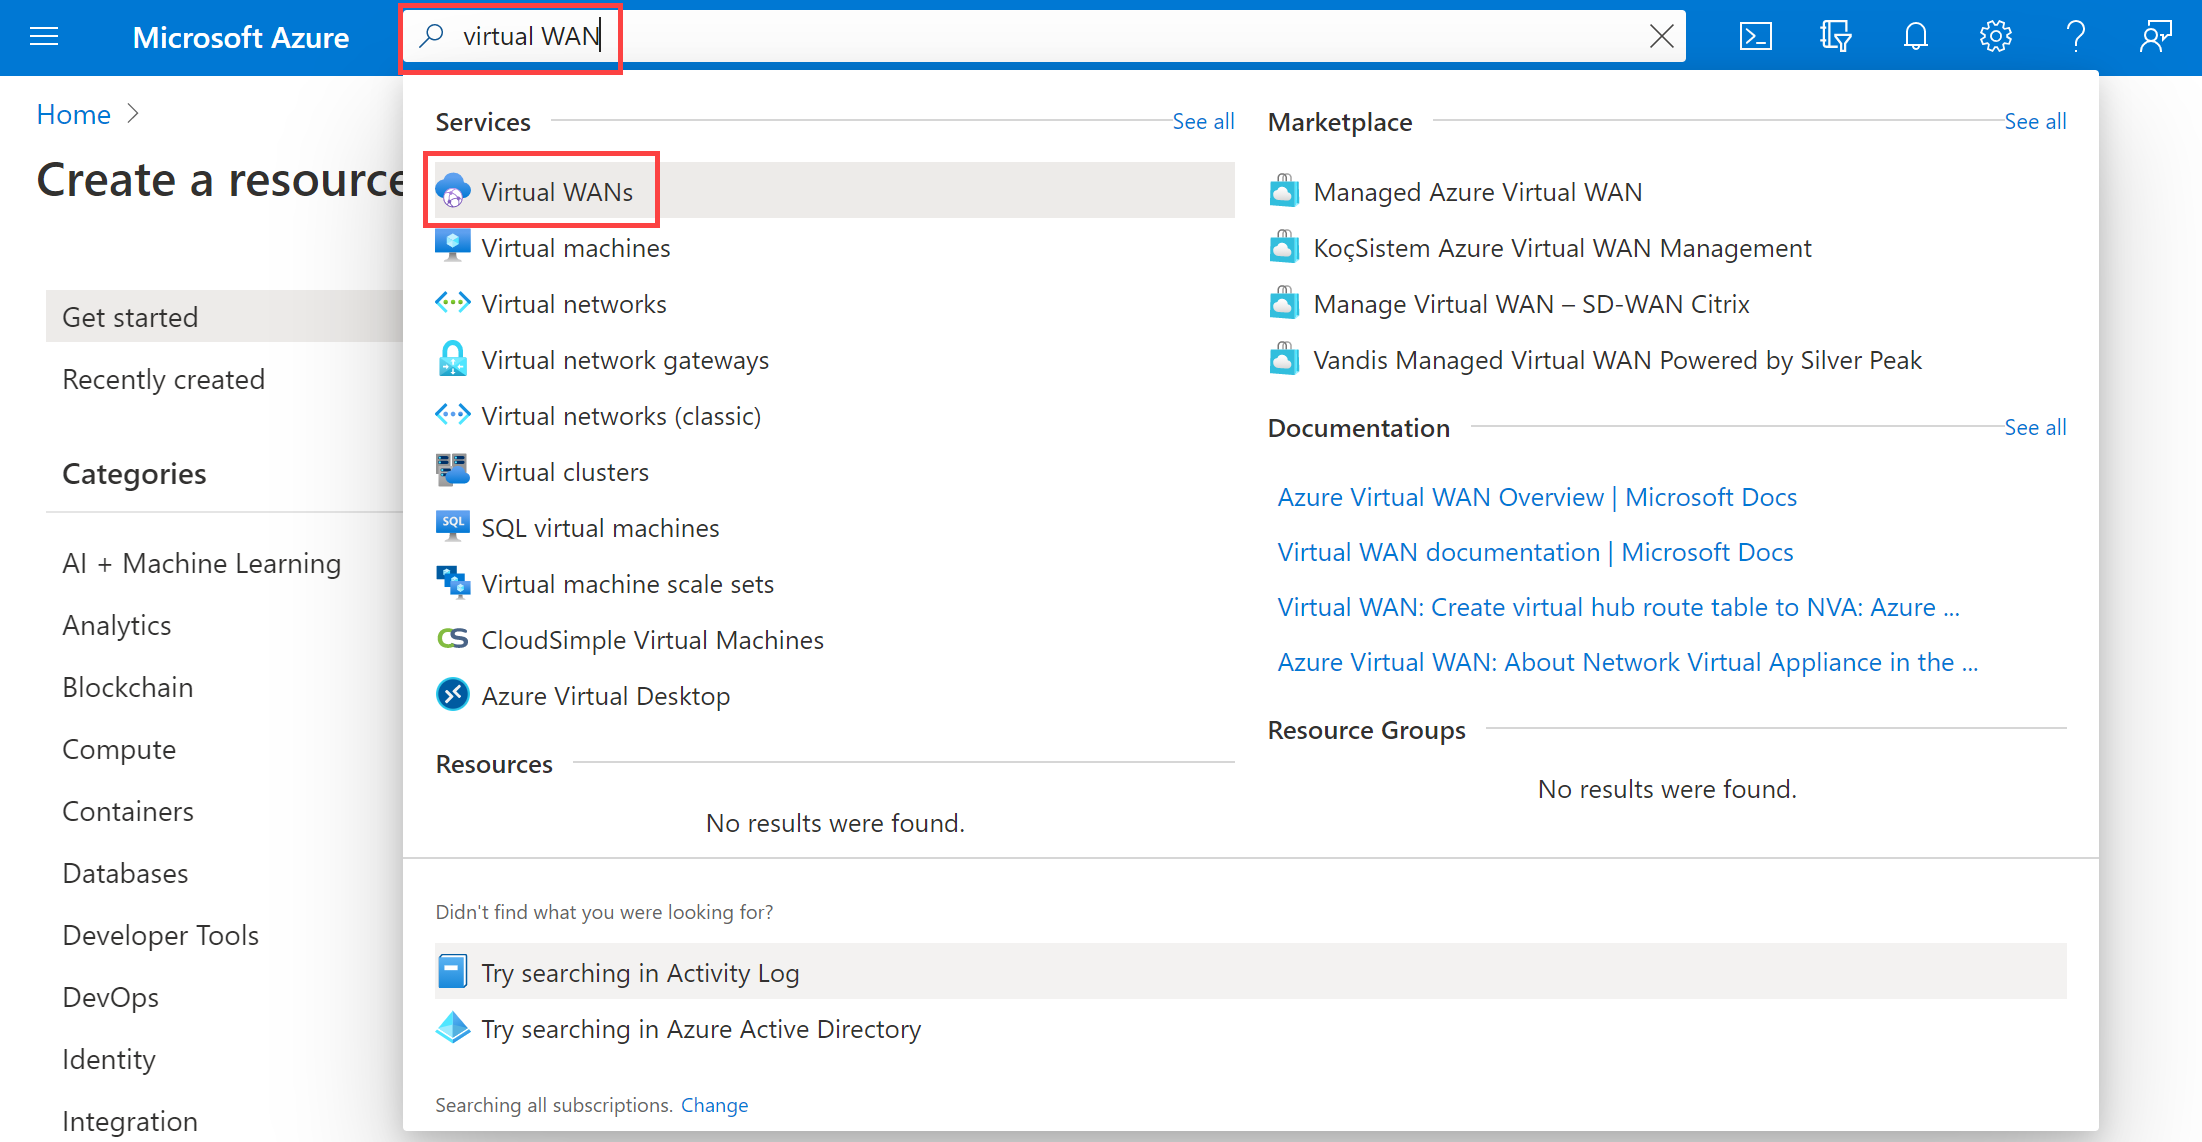
In the portal, type Virtual WAN into the search box and select Virtual WANs from the results list.
-
On the Virtual WAN page, select + Create.
-
On the Create WAN page, on the Basics tab, fill in the following fields:
-
Subscription: Use the existing subscription
-
Resource group: ContosoResourceGroup
-
Resource group location: Choose a resource location from the dropdown. A WAN is a global resource and does not live in a particular region. However, you must select a region to manage and locate the WAN resource that you create.
-
Name: ContosoVirtualWAN
-
Type: Standard
-
-
When you have finished filling out the fields, select Review +Create.
-
Once validation passes, select Create to create the Virtual WAN.
-
Wait for deployment to complete (this should take a couple of minutes) and select Go to resource.
Task 3: Create a hub by using Azure Portal
A hub contains gateways for site-to-site, ExpressRoute, or point-to-site functionality. It takes 30 minutes to create the site-to-site VPN gateway in the virtual hub. You must create a Virtual WAN before you can create a hub.
-
On the Virtual WAN page, under Connectivity, select Hubs.
-
On the Hubs page, select +New Hub to open the Create virtual hub page.
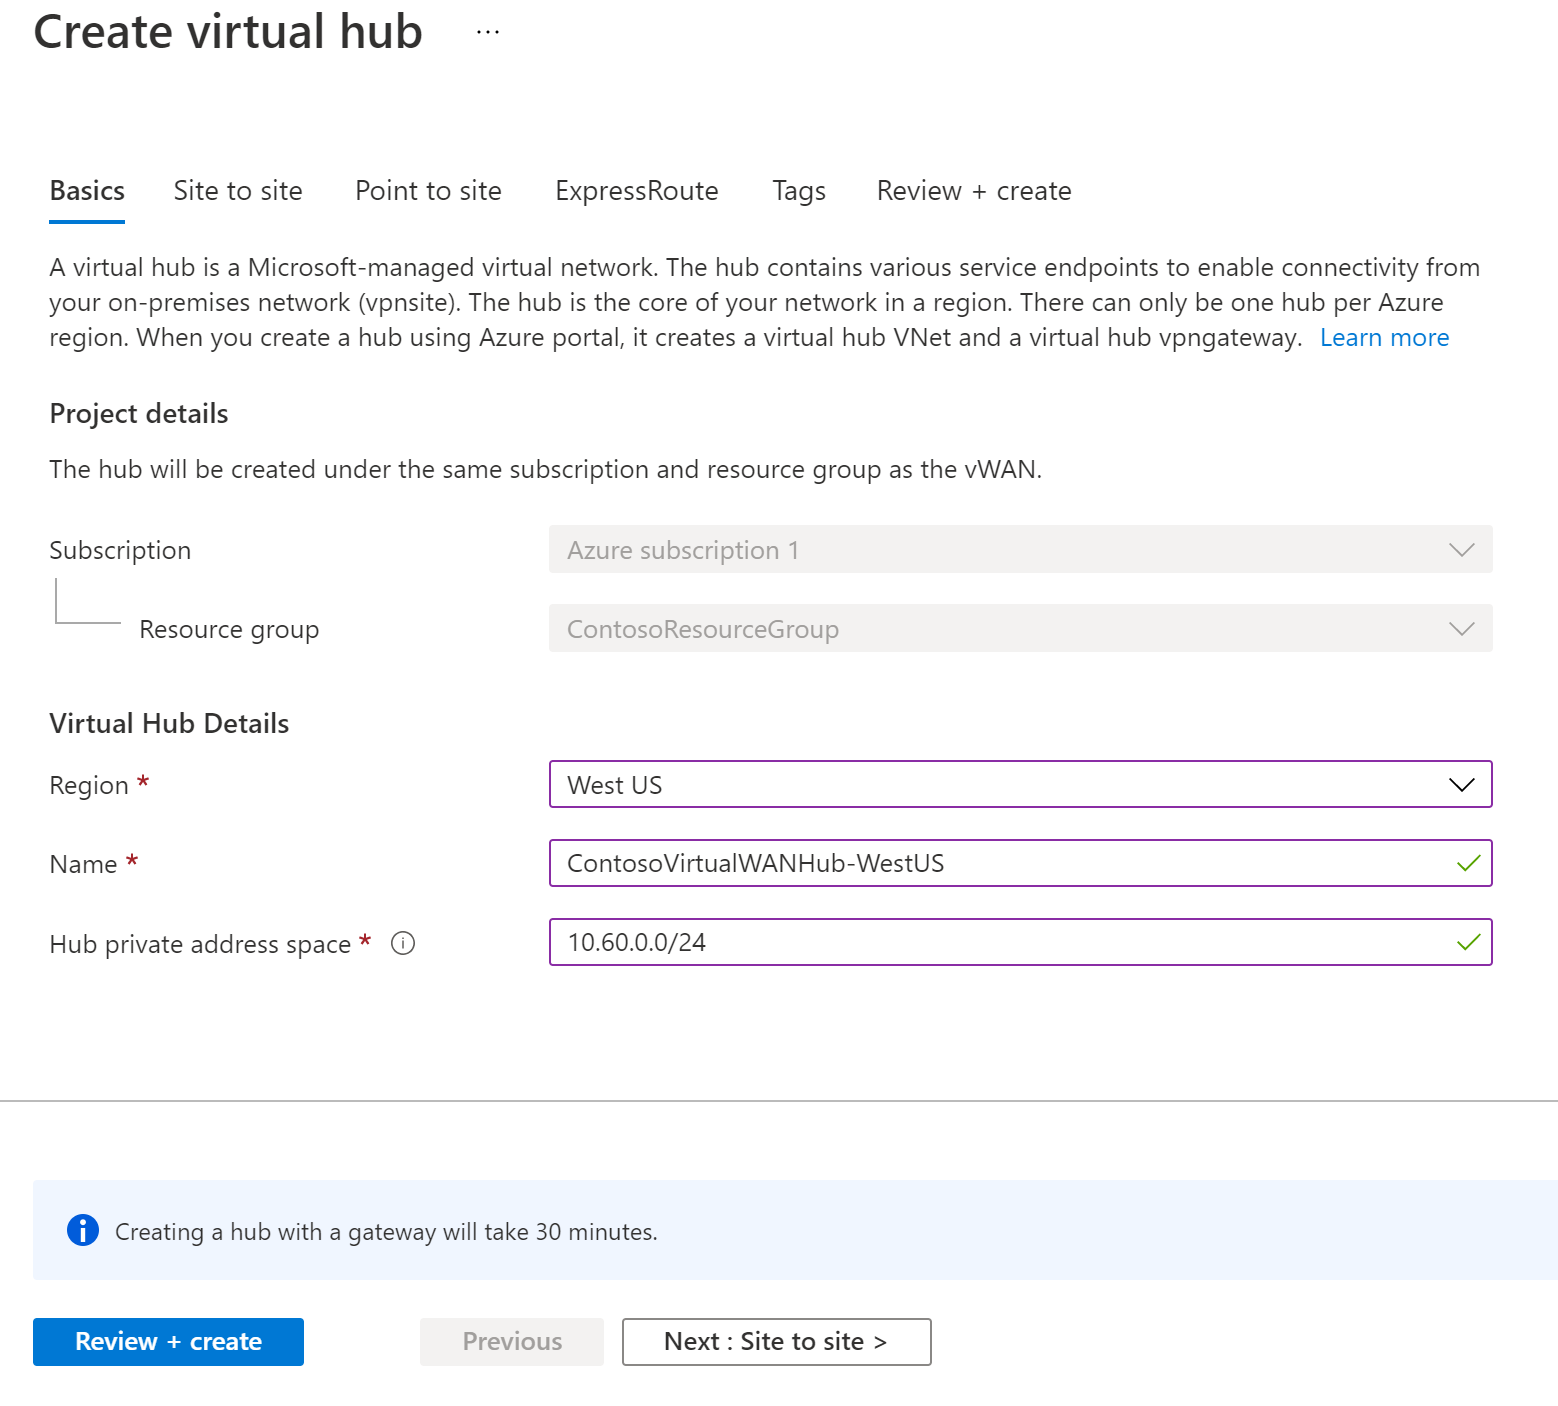
- On the Create virtual hub page Basics tab, complete the following fields:
- Region: West US
- Name: ContosoVirtualWANHub-WestUS
- Hub private address space: 10.60.0.0/24
- Virtual hub capacity: 2 Routing infrastructure units
- Hub routing preference: VPN
-
Select Next: Site-to-site.
- On the Site-to-site tab, complete the following fields:
- Do you want to create a Site to site (VPN gateway)?: Yes
- The AS Number field cannot be edited.
- Gateway scale units: 1 scale unit = 500 Mbps x 2
- Routing preference: leave the default
-
Select Review + Create to validate.
-
Once validation has completed, select Create to create the hub.
- After 30 minutes, Refresh to view the hub on the Hubs page.
Task 4: Connect a VNet to the Virtual Hub
-
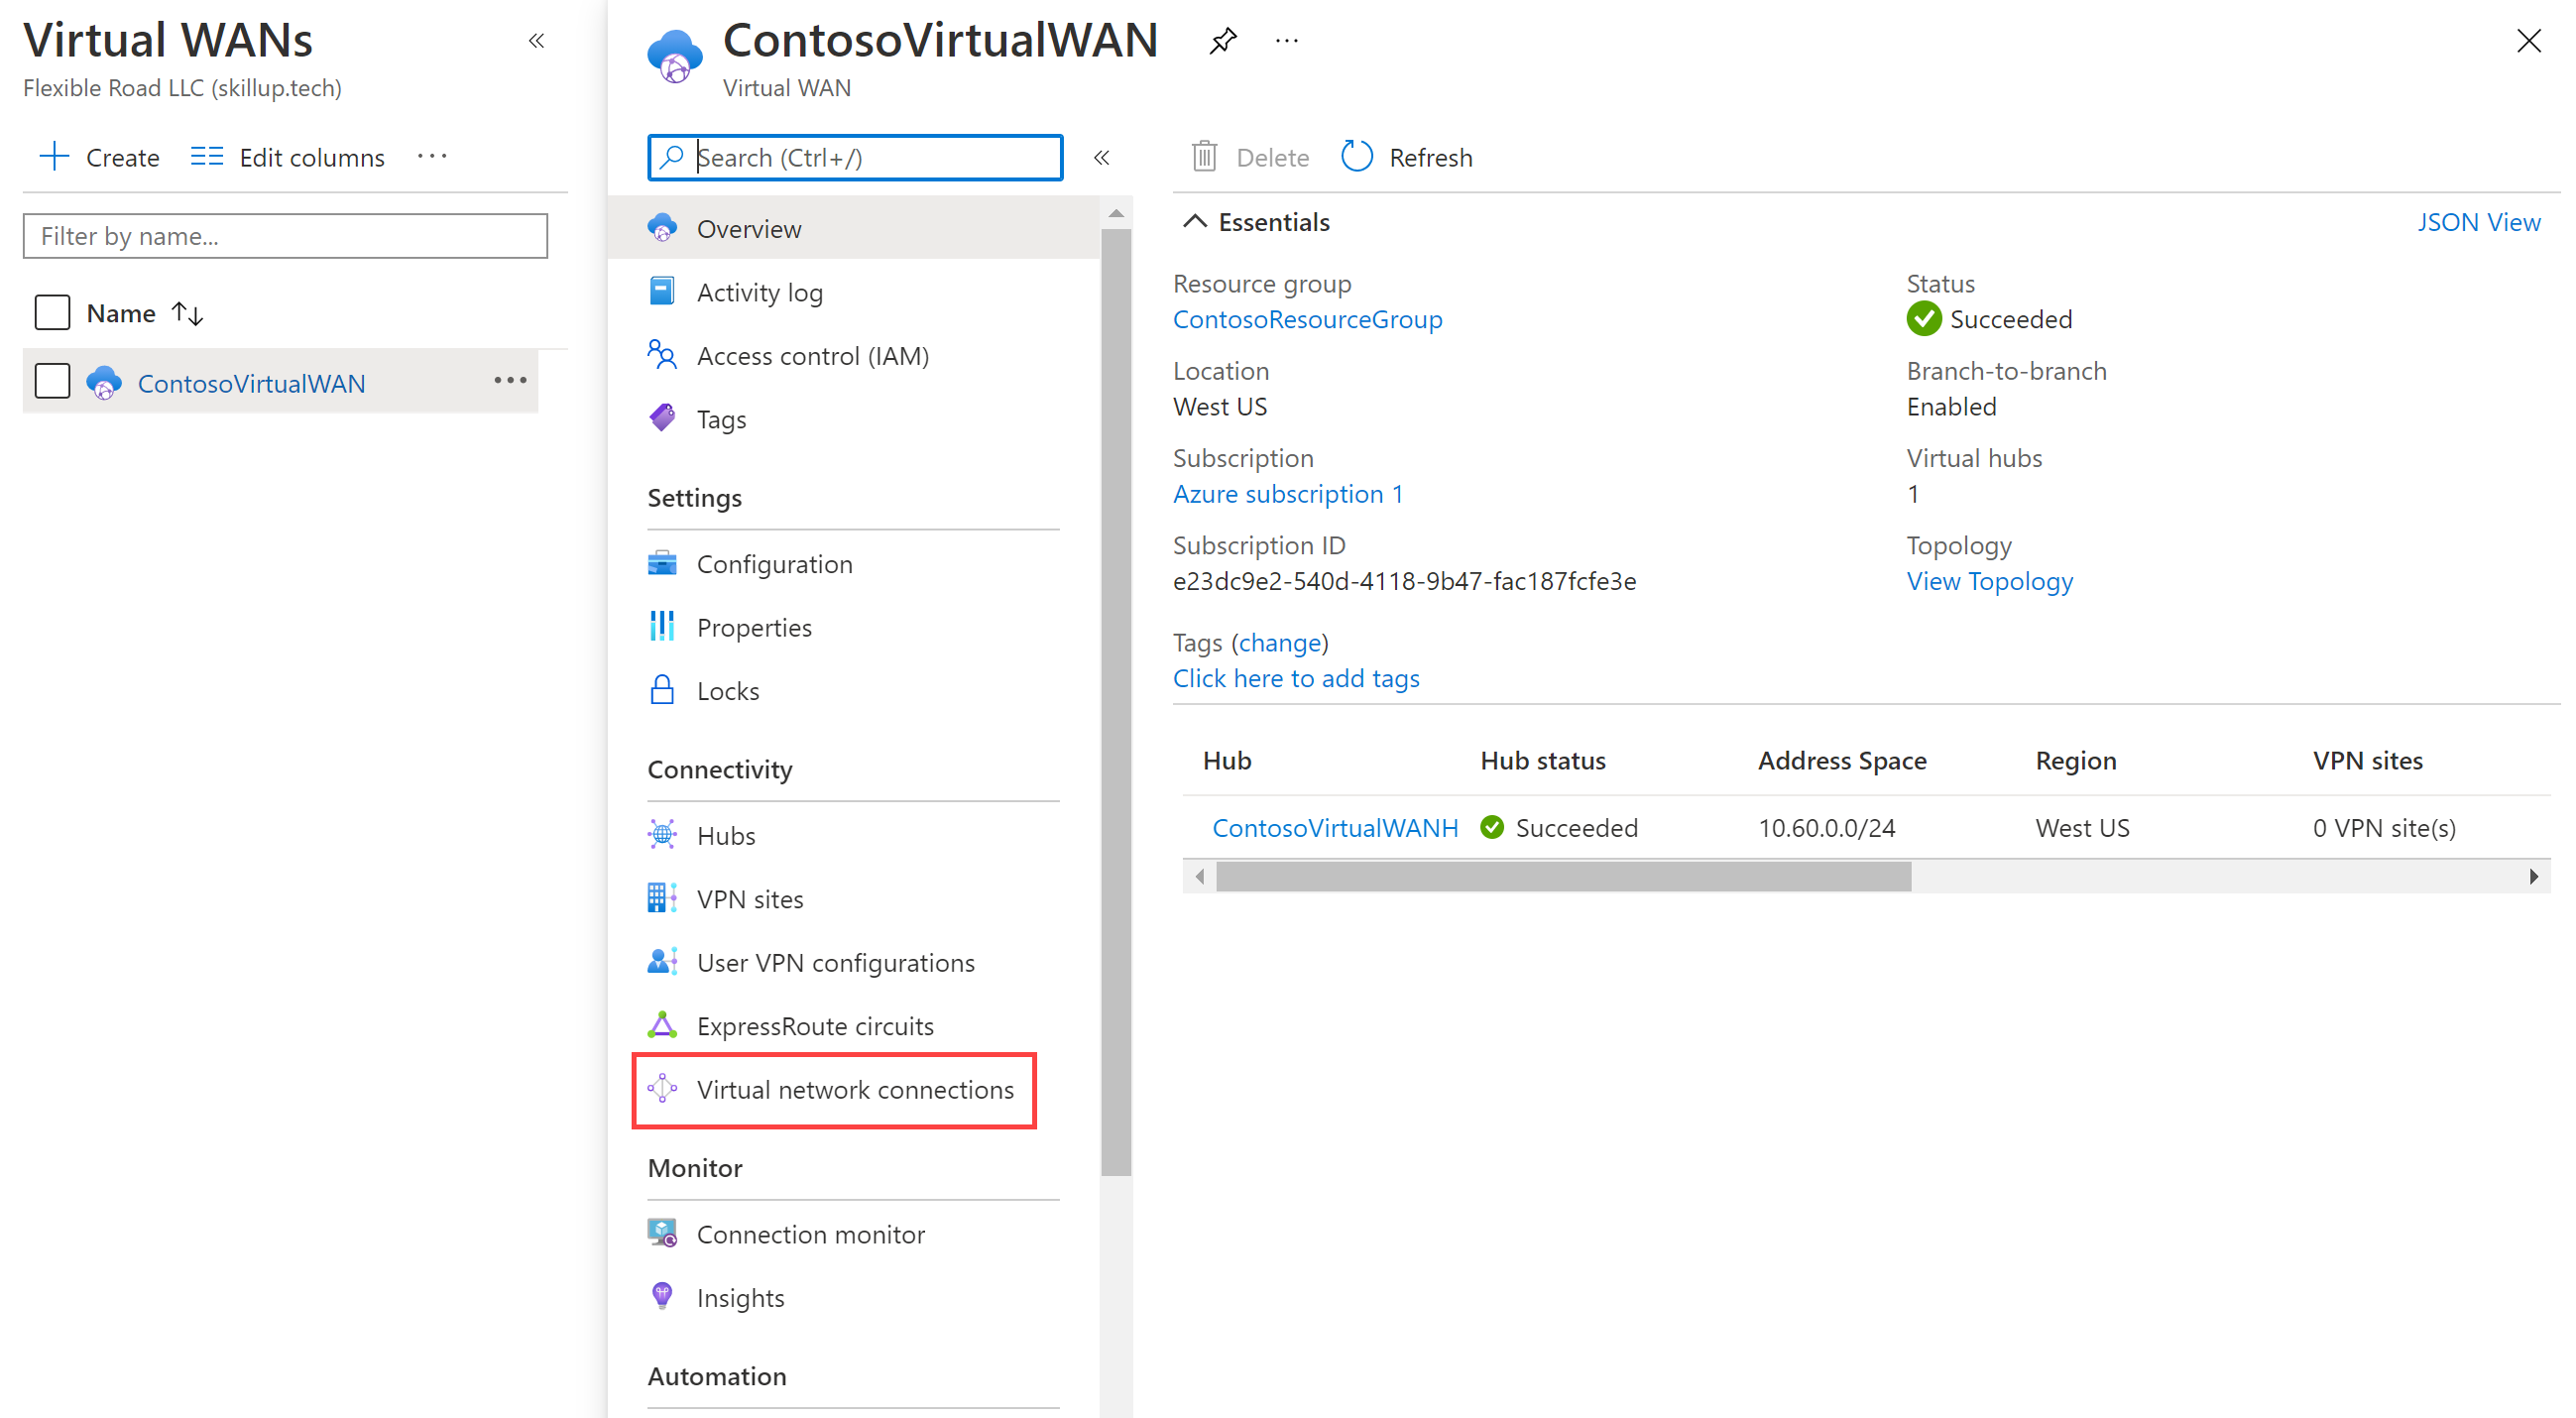
Locate the Virtual WAN that you created.
-
In ContosoVirtualWAN, under Connectivity, select Virtual network connections.
-
On ContosoVirtualWAN | Virtual network connections, select + Add connection.
-
In Add connection, use the following information to create the connection.
-
Connection name: ContosoVirtualWAN-to-ResearchVNet
-
Hubs: ContosoVirtualWANHub-WestUS
-
Subscription: no changes
-
Resource Group: ContosoResourceGroup
-
Virtual network: ResearchVNet
-
Propagate to none: Yes
-
Associate Route Table: Default
-
-
Select Create.
Congratulations! You have created a Virtual WAN and a Virtual WAN Hub and connected the ResearchVNet to the hub.
Task 5: Clean up resources
Note: Remember to remove any newly created Azure resources that you no longer use. Removing unused resources ensures you will not see unexpected charges.
-
On the Azure portal, open the PowerShell session within the Cloud Shell pane.
-
Delete all resource groups you created throughout the labs of this module by running the following command:
Remove-AzResourceGroup -Name 'ContosoResourceGroup' -Force -AsJobNote: The command executes asynchronously (as determined by the -AsJob parameter), so while you will be able to run another PowerShell command immediately afterwards within the same PowerShell session, it will take a few minutes before the resource groups are actually removed.