Azure-Advanced-Networking
M03-Unit 5 Provision an ExpressRoute circuit
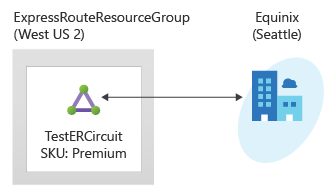
In this exercise, you will create an ExpressRoute circuit using the Azure portal and the Azure Resource Manager deployment model.
Note: An interactive lab simulation is available that allows you to click through this lab at your own pace. You may find slight differences between the interactive simulation and the hosted lab, but the core concepts and ideas being demonstrated are the same.
Estimated time: 15 minutes
In this exercise, you will:
- Task 1: Create and provision an ExpressRoute circuit
- Task 2: Retrieve your Service key
- Task 3: Deprovisioning an ExpressRoute circuit
- Task 4: Clean up resources
Task 1: Create and provision an ExpressRoute circuit
-
From a browser, navigate to the Azure portal and sign in with your Azure account.
[!Important]
Your ExpressRoute circuit is billed from the moment a service key is issued. Ensure that you perform this operation when the connectivity provider is ready to provision the circuit.
-
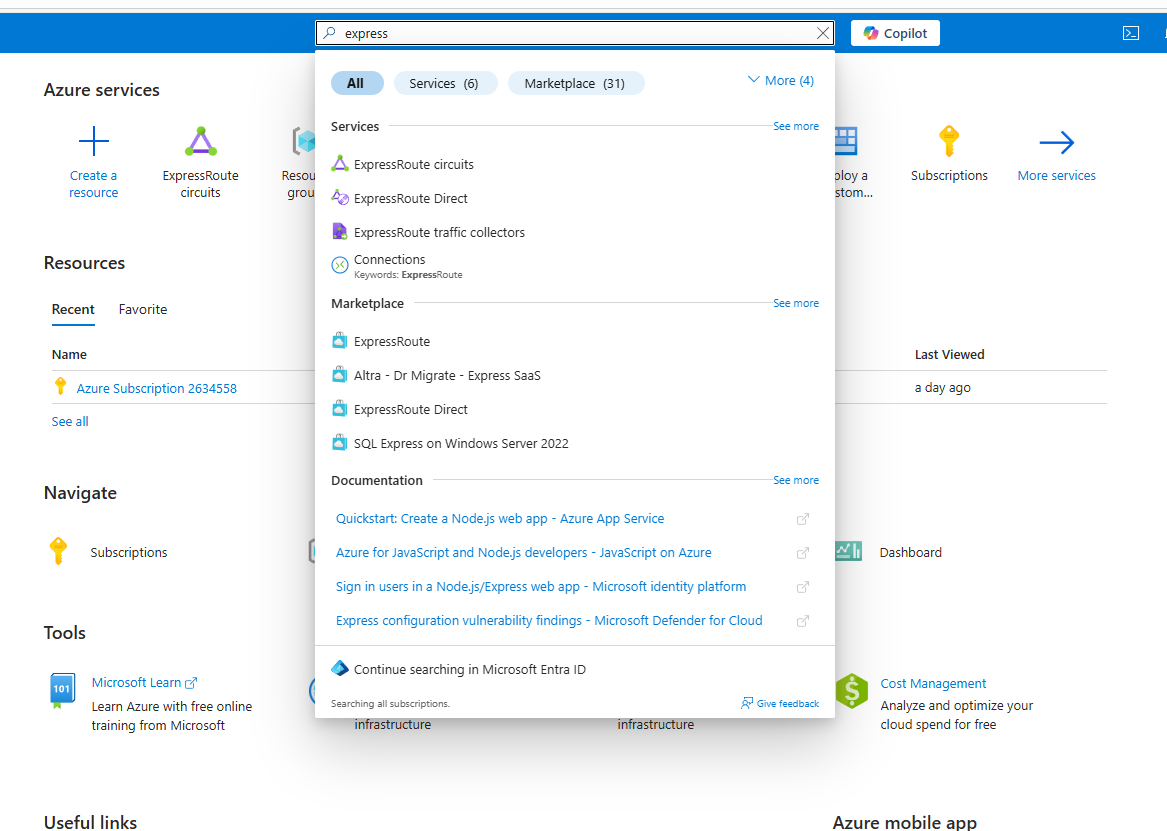
On the Azure portal search area type Express, , and then select ExpressRoute Curcuits, as shown in the following image.
-
On the Create ExpressRoute Configuration Tab, provide the following:
Setting Value Resource Group ExpressRouteResourceGroup (Create New) Resiliency Standard Location East US 2 Name TestERCircuit Provider Equinix Peering Location Seattle Bandwidth 50Mbps SKU Standard -
Select Review + Create.
-
Confirm that the ExpressRoute configuration passes validation and then select Create.
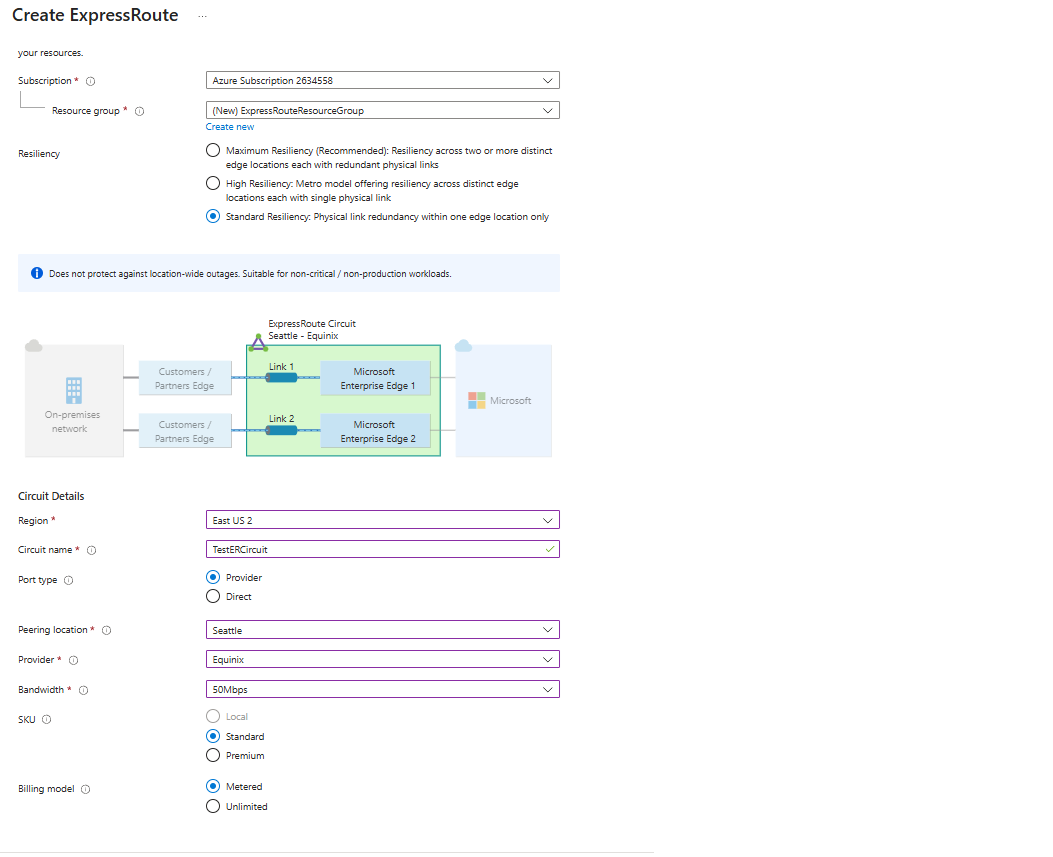
- Port type determines if you are connecting to a service provider or directly into Microsoft’s global network at a peering location.
- Create new or import from classic determines if a new circuit is being created or if you are migrating a classic circuit to Azure Resource Manager.
- Provider is the internet service provider who you will be requesting your service from.
- Peering Location is the physical location where you are peering with Microsoft.
[!Important]
The Peering Location indicates the physical location where you are peering with Microsoft. This is not linked to “Location” property, which refers to the geography where the Azure Network Resource Provider is located. While they are not related, it is a good practice to choose a Network Resource Provider geographically close to the Peering Location of the circuit.
- SKU determines whether an ExpressRoute local, ExpressRoute standard, or an ExpressRoute premium add-on is enabled. You can specify Local to get the local SKU, Standard to get the standard SKU or Premium for the premium add-on. You can change the SKU to enable the premium add-on.
[!Important]
You cannot change the SKU from Standard/Premium to Local.
- Billing model determines the billing type. You can specify Metered for a metered data plan and Unlimited for an unlimited data plan. You can change the billing type from Metered to Unlimited.
[!Important]
You cannot change the type from Unlimited to Metered.
- Allow classic operation will allow classic virtual networks to be link to the circuit.
Task 2: Retrieve your Service key
-
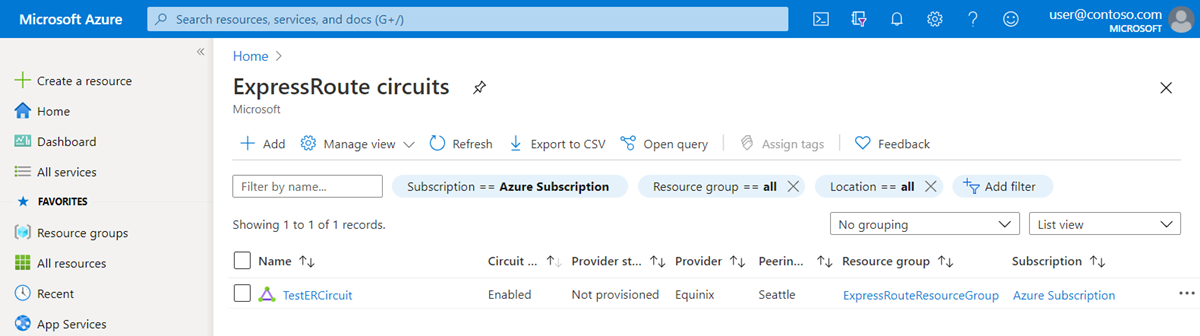
On any Azure Portal page, in Search resources, services and docs, enter ExpressRoute circuits, and then select ExpressRoute circuits from the results.
-
All ExpressRoute circuits created in the subscription will appear here.
-
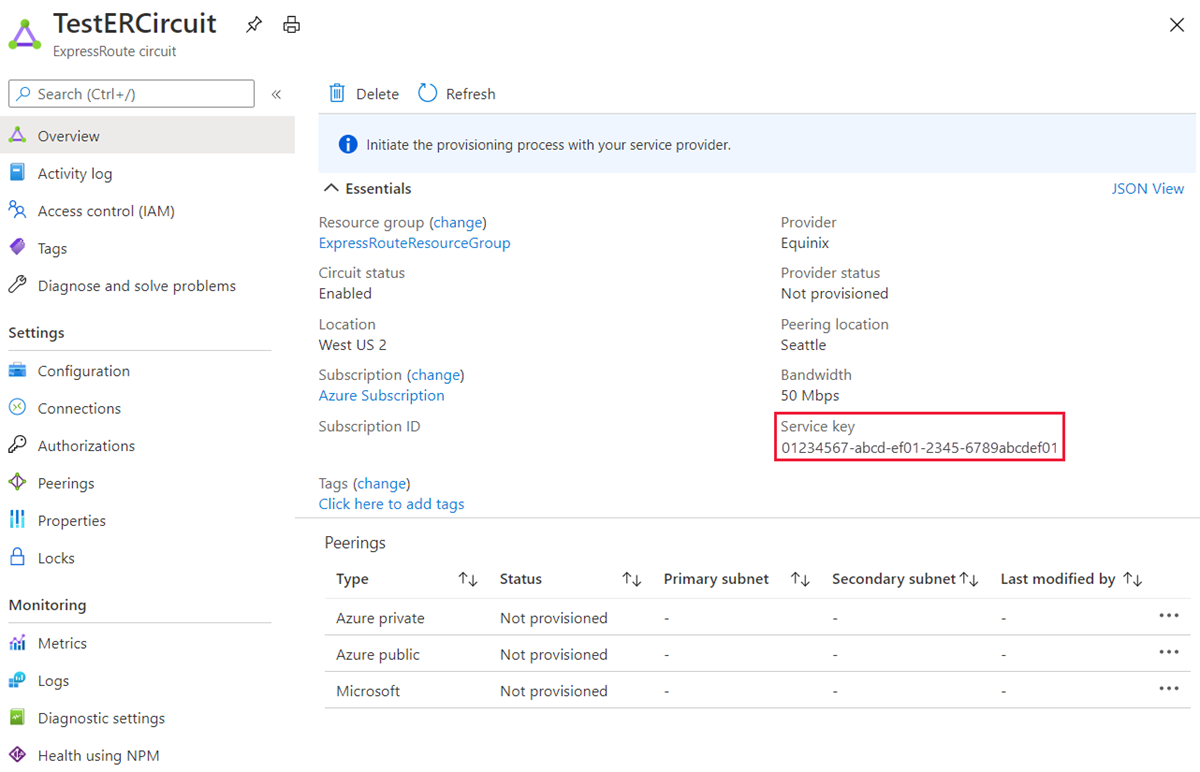
The circuit page displays the properties of the circuit. The service key appears in the service key field. Your service provider will need the Service Key to complete the provisioning process. The service key is specific to your circuit. You must send the service key to your connectivity provider for provisioning.
-
On this page, Provider status gives you the current state of provisioning on the service-provider side. Circuit status provides you the state on the Microsoft side.
-
When you create a new ExpressRoute circuit, the circuit is in the following state:
- Circuit status: Enabled
-
Provider status: Not provisioned
- The circuit changes to the following state when the connectivity provider is currently enabling it for you:
- Provider status: Provisioning
- Circuit status: Enabled
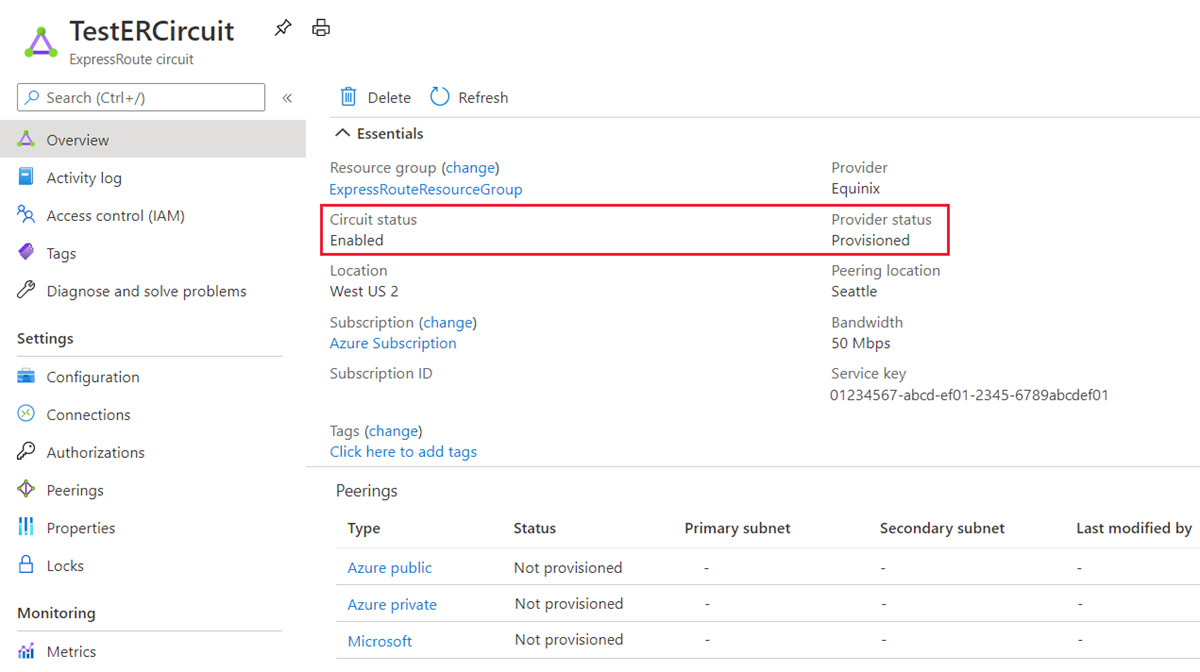
- To use the ExpressRoute circuit, it must be in the following state:
- Provider status: Provisioned
- Circuit status: Enabled
- You should periodically check the provisioning status and the state of the circuit status.
Congratulations! You have created an ExpressRoute circuit and located the Service key, which you would need to complete the provisioning of the circuit.
Task 3: Deprovisioning an ExpressRoute circuit.
If the ExpressRoute circuit service provider provisioning state is Provisioning or Provisioned, you must work with your service provider to deprovision the circuit on their side. Microsoft can continue to reserve resources and bill you until the service provider completes deprovisioning the circuit and notifies us.
[!Note]
You must unlink all virtual networks from the ExpressRoute circuit before deprovisioning. If this operation fails, check whether any virtual networks are linked to the circuit.
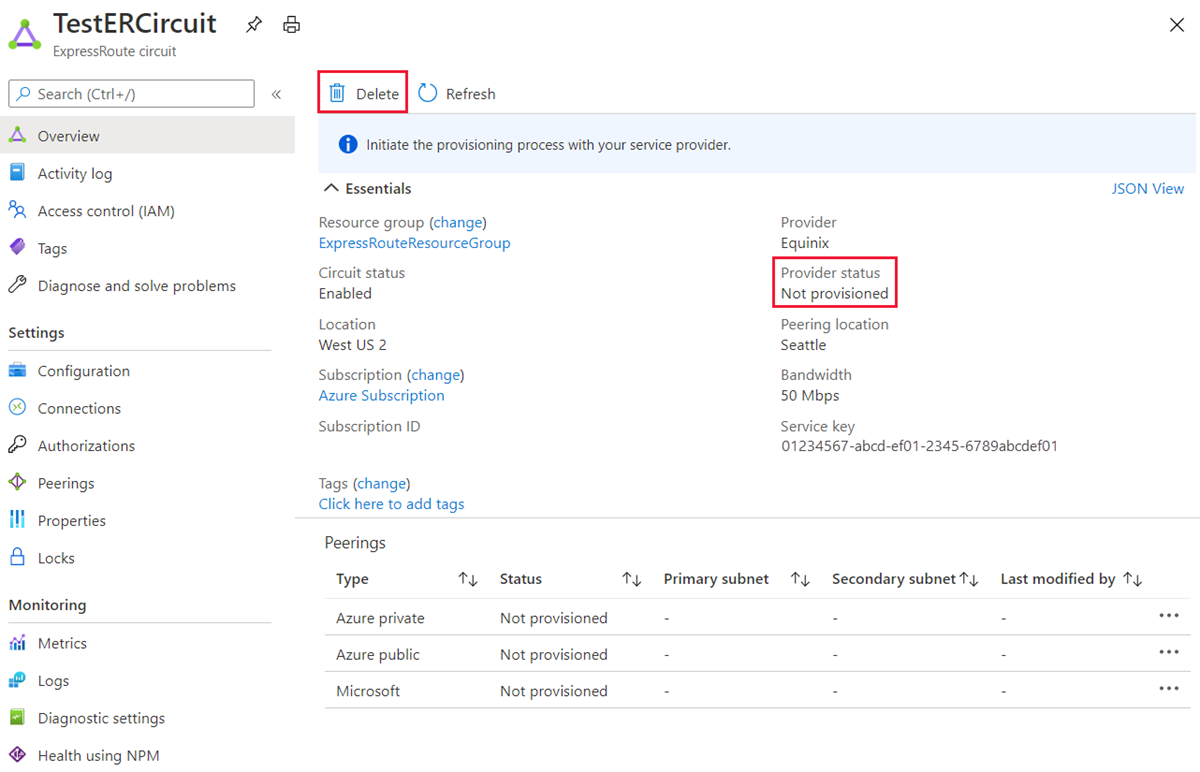
If the service provider has deprovisioned the circuit (the service provider provisioning state is set to Not provisioned), you can delete the circuit. This stops billing for the circuit.
Task 5: Clean up resources
You can delete your ExpressRoute circuit by selecting the Delete icon. Ensure the provider status is Not provisioned before proceeding.
Note: Remember to remove any newly created Azure resources that you no longer use. Removing unused resources ensures you will not see unexpected charges.
-
On the Azure portal, open the PowerShell session within the Cloud Shell pane.
-
Delete all resource groups you created throughout the labs of this module by running the following command:
Remove-AzResourceGroup -Name 'ExpressRouteResourceGroup' -Force -AsJobNote: The command executes asynchronously (as determined by the -AsJob parameter), so while you will be able to run another PowerShell command immediately afterwards within the same PowerShell session, it will take a few minutes before the resource groups are actually removed.