Azure-Advanced-Networking
M05-Unit 6 Create a Front Door for a highly available web application using the Azure portal
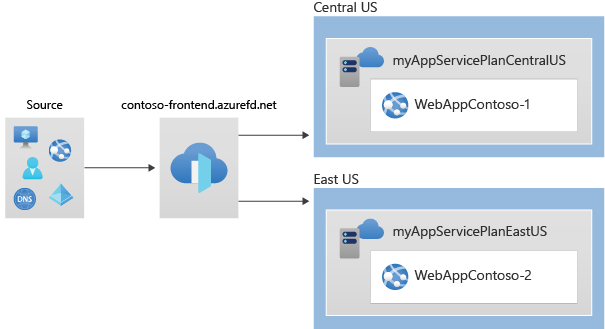
In this exercise, you will set up an Azure Front Door configuration that pools two instances of a web application that runs in different Azure regions. This configuration directs traffic to the nearest site that runs the application. Azure Front Door continuously monitors the web application. You will demonstrate automatic failover to the next available site when the nearest site is unavailable. The network configuration is shown in the following diagram:

In this exercise, you will:
- Task 1: Register the Microsoft.cdn Resource Provider
- Task 2: Create two instances of a web app
- Task 3: Create a Front Door for your application
- Task 4: View Azure Front Door in action
-
Task 5: Clean up resources
Note: An interactive lab simulation is available that allows you to click through this lab at your own pace. You may find slight differences between the interactive simulation and the hosted lab, but the core concepts and ideas being demonstrated are the same.
Estimated time: 30 minutes
Task 1: Register microsoft.cdn.
-
On the Azure portal, open the PowerShell session within the Cloud Shell pane.
-
Register microsoft.cdn by running the following command:
Register-AzResourceProvider -ProviderNamespace microsoft.cdn -
When the command has completed, close Cloud Shell.
Task 2: Create two instances of a web app
This exercise requires two instances of a web application that run in different Azure regions. Both the web application instances run in Active/Active mode, so either one can take traffic. This configuration differs from an Active/Stand-By configuration, where one acts as a failover.
-
Sign in to the Azure portal at https://portal.azure.com.
-
On the Azure home page, using the global search type WebApp and select App Services under services.
-
Select + Create to create a Web App.
-
On the Create Web App page, on the Basics tab, enter or select the following information.
Setting Value Subscription Select your subscription. Resource group Select (Create new) ContosoResourceGroup Name Enter a unique Name for your web app. This example uses WebAppContosoNE. Publish Select Code. Runtime stack Select .NET 8 (LTS). Operating System Select Windows. Region Select North Europe. Windows Plan Select Create new Name: myAppServicePlanNorthEurope. Princing Plan Select Premium V4 POV4 (4 GB memory, 1 vCPU). -
Select the Monitor and Secure tab.
-
On the Monitor and Secure tab, select the No option for Enable Application Insights.
-
Select Review + create, review the Summary, and then select Create.
It might take several minutes for the deployment to complete. -
Create a second web app. On the Azure Portal home page, search WebApp.
-
Select + Create to create a Web App.
-
On the Create Web App page, on the Basics tab, enter or select the following information.
Setting Value Subscription Select your subscription. Resource group Select the resource group ContosoResourceGroup Name Enter a unique Name for your web app. This example uses WebAppContosoWE. Publish Select Code. Runtime stack Select .NET 8 (LTS). Operating System Select Windows. Region Select West Europe. Windows Plan Select Create new Name: myAppServicePlanWestEurope. Pricing Plan Select Premium V4 POV4 (4 GB memory, 1 vCPU). -
Select the Monitor and Secure tab.
-
On the Monitor and Secure tab, select the No option for Enable Application Insights.
-
Select Review + create, review the Summary, and then select Create.
It might take several minutes for the deployment to complete.
Task 3: Create a Front Door for your application
Configure Azure Front Door to direct user traffic based on lowest latency between the two web apps servers. To begin, add a frontend host for Azure Front Door.
-
On any Azure Portal page, in Search resources, services and docs (G+/), Search for Front Doors, and then select Front Doors.
-
Select Create front doors. On the Compare offerings page, select Quick create. Then select Continue to create a Front Door.
-
On the Basics tab, enter or select the following information.
Setting Value Subscription Select your subscription. Resource group Select ContosoResourceGroup Resource group location Accept default setting Name Enter a unique name in this subscription like FrontDoor(yourinitials) Tier Standard Endpoint Name FDendpoint Origin Type App Service Origin host name Select WebAppContosoNE-???? -
Select Review and Create, and then select Create.
-
Wait for the resource to deploy (This can take a few minutes), and then select Go to resource.
-
On the Front Door blade, in the menu, under Settings: Select Origin Groups.
-
Select default-origin-group from the list.
-
On the Update origin group blade: Select Add an origin.
-
Add the second Web App using the following table details. Leave other default settings
Setting Value Name WebAppContosoWE Origin Type App Service host name Select WebAppContosoWE-???? -
Click Add
-
Click Update
Wait for deployment to complete.
Task 4: View Azure Front Door in action
Once you create a Front Door, it takes a few minutes for the configuration to be deployed globally. Once complete, access the frontend host you created.
-
On the Front Door resource in the Overview blade, locate the endpoint hostname that is created for your endpoint. This should be fdendpoint followed by a hyphen and a random string. For example, fdendpoint-fxa8c8hddhhgcrb9.z01.azurefd.net. Copy this FQDN.
-
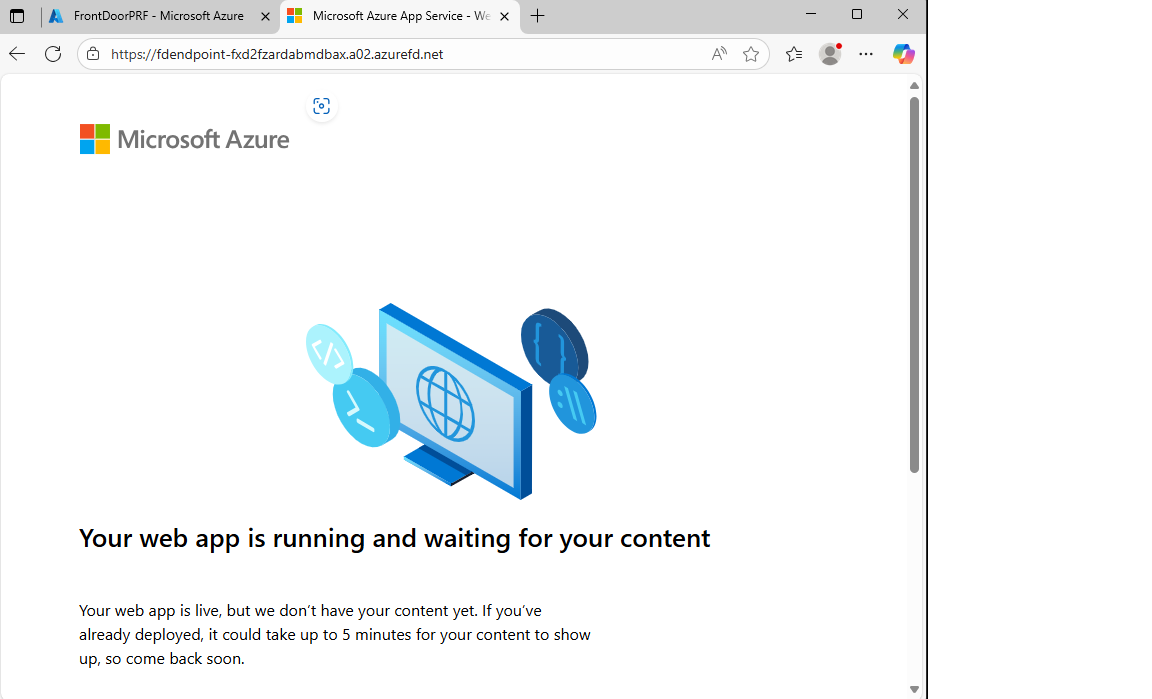
In a new browser tab, navigate to the Front Door endpoint FQDN. The default App Service page will be displayed.

-
To test instant global failover in action, try the following steps:
-
Switch to the Azure portal, search for and select App services.
-
Select one of your web apps, then select Stop, and then select Yes to verify.

-
Switch back to your browser and select Refresh. You should see the same information page.
There may be a delay while the web app stops. If you get an error page in your browser, refresh the page.
-
Switch back to the Azure Portal, locate the other web app, and stop it.
-
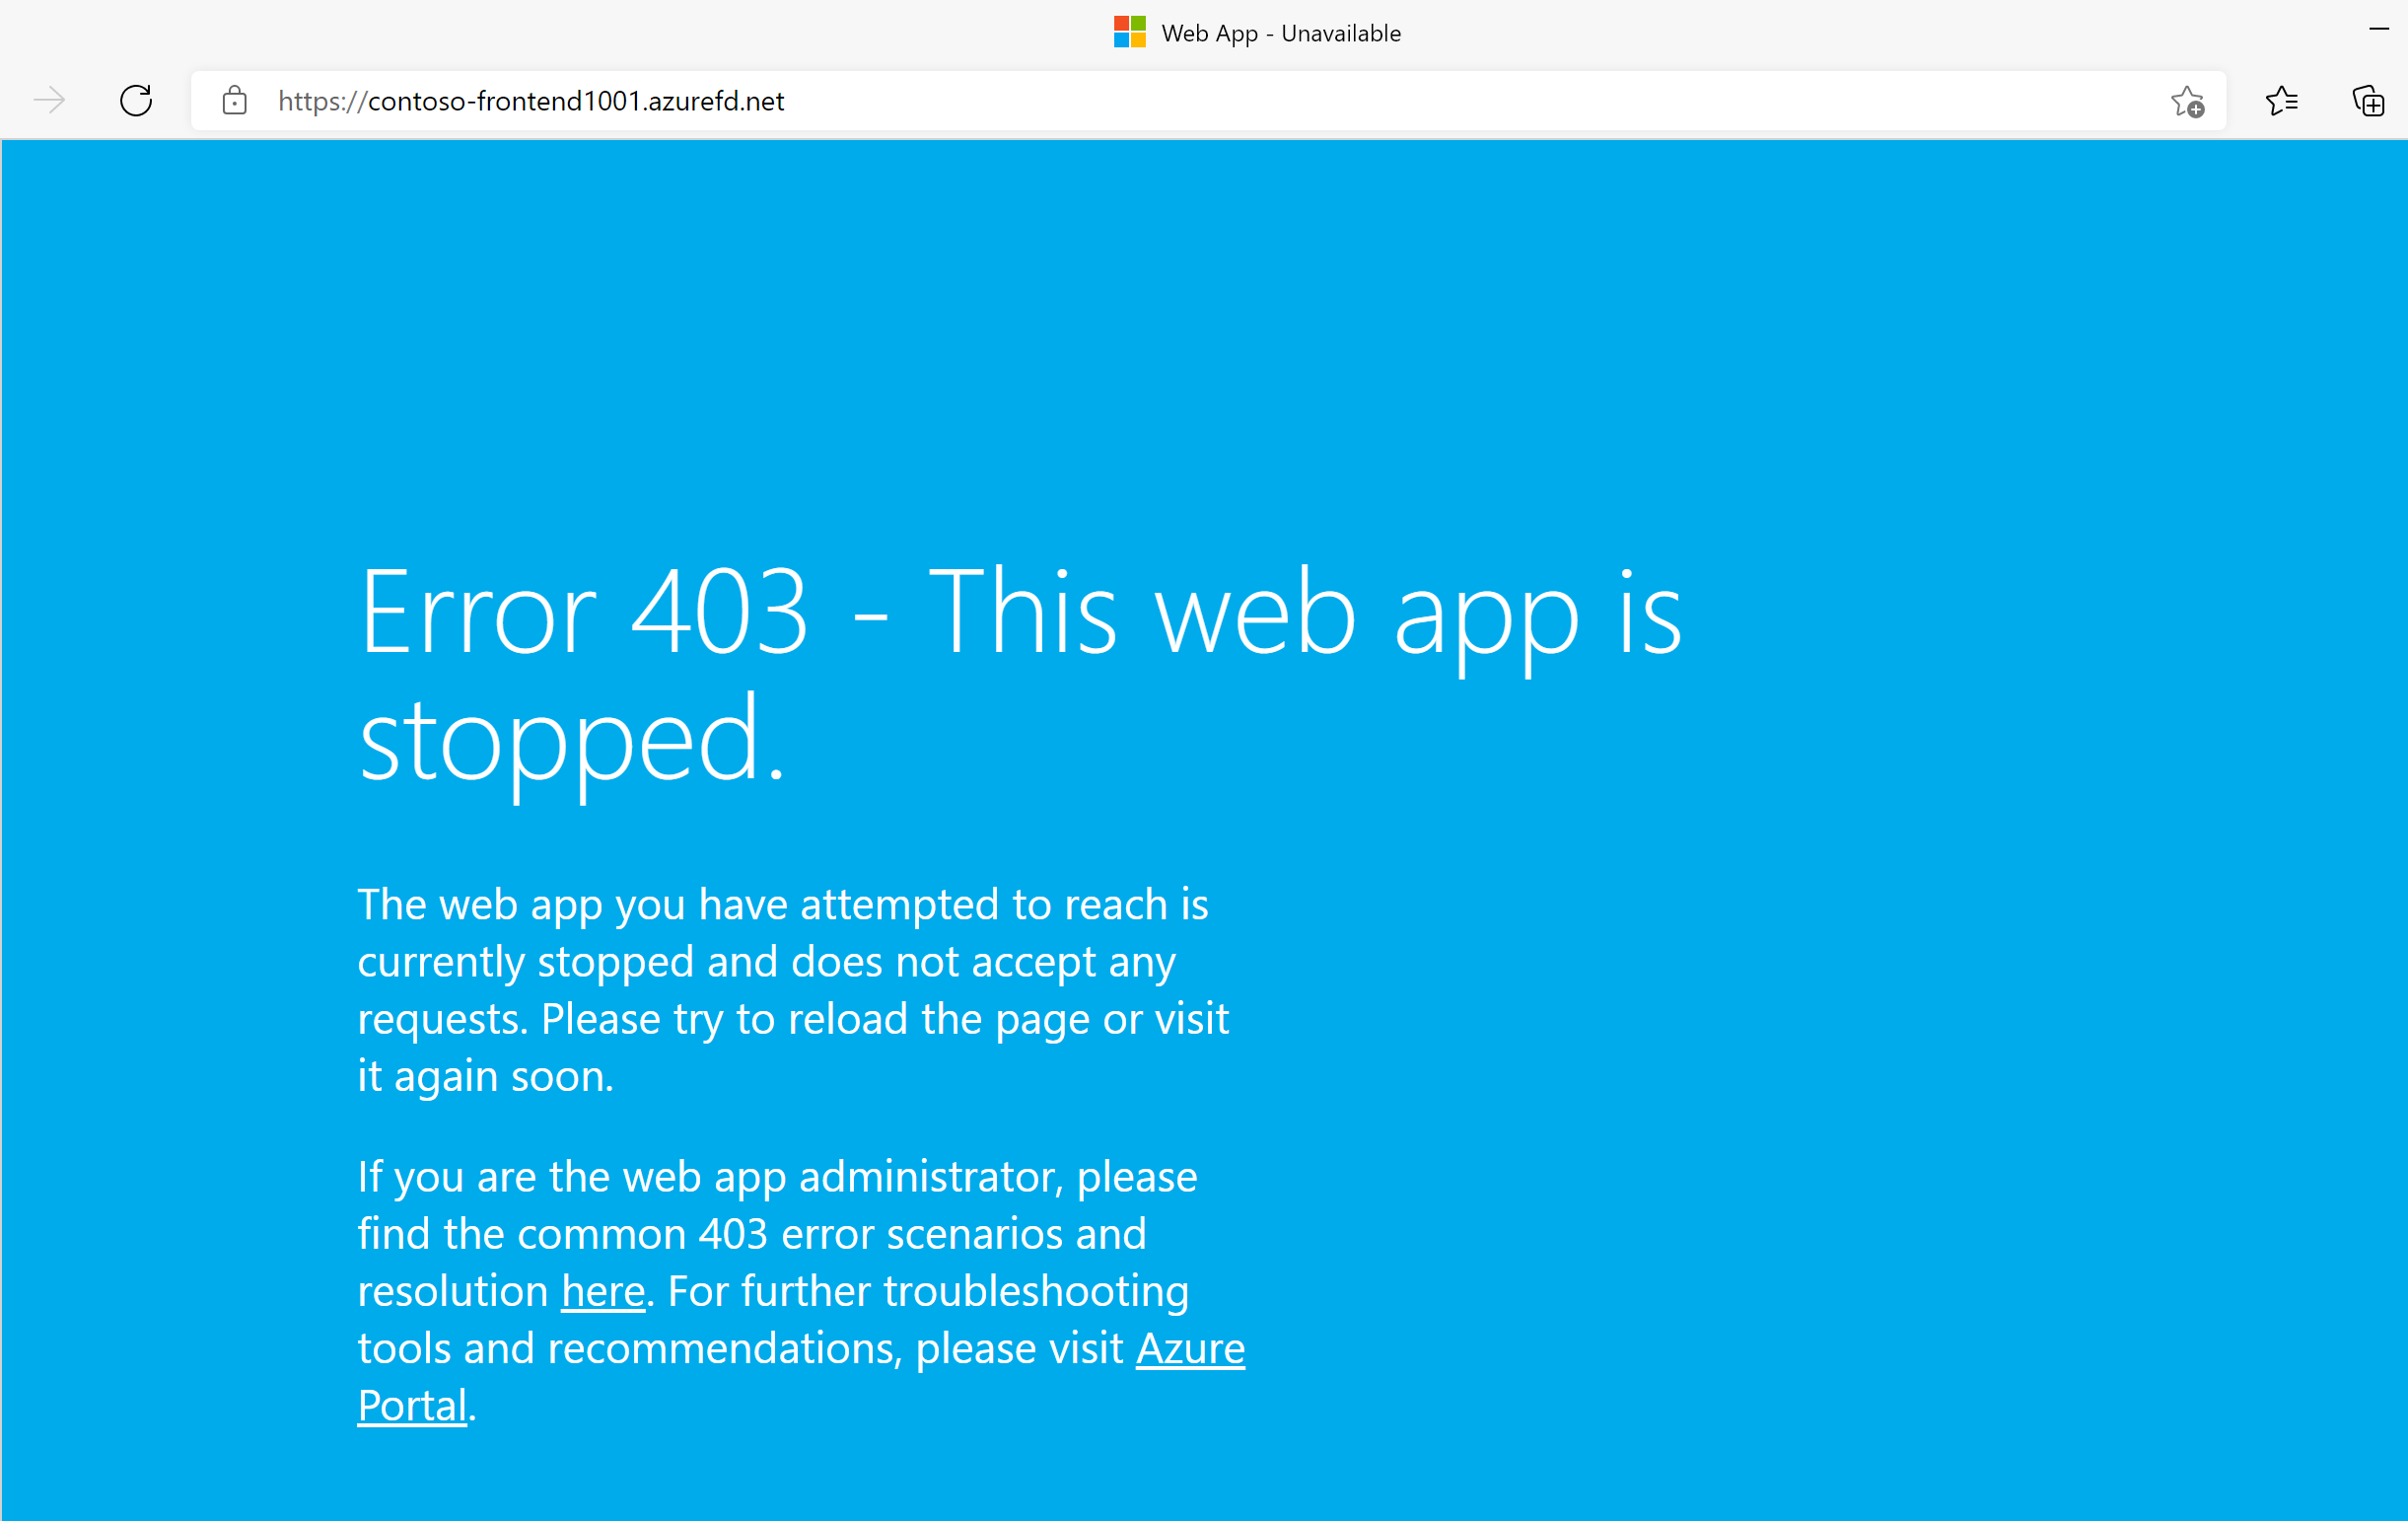
Switch back to your browser and select Refresh. This time, you should see an error message.

Congratulations! You have configured and tested an Azure Front Door.
Task 5: Clean up resources
Note: Remember to remove any newly created Azure resources that you no longer use. Removing unused resources ensures you will not see unexpected charges.
-
On the Azure portal, open the PowerShell session within the Cloud Shell pane.
-
Delete all resource groups you created throughout the labs of this module by running the following command:
Remove-AzResourceGroup -Name 'ContosoResourceGroup' -Force -AsJobNote: The command executes asynchronously (as determined by the -AsJob parameter), so while you will be able to run another PowerShell command immediately afterwards within the same PowerShell session, it will take a few minutes before the resource groups are actually removed.